Best oval diamond settings to avoid the bow-tie effect
Choose the oval before the setting
A beautiful setting cannot correct an oval diamond that looks persistently dark across its centre. No setting guarantees a fix for the bow-tie effect. Choose the stone’s appearance first, then the design around it.
For your 2026 shortlist, ask David to separate those two decisions. Diagem offers certified natural and lab-grown diamonds and bespoke jewellery, with Johannesburg viewings by appointment. Start with our oval engagement rings if you are exploring the overall look.
What causes the oval diamond ring bow tie effect?
The bow-tie effect is a dark, bow-shaped area across an elongated diamond’s centre. It relates to how the facets return light and how the observer, camera and surroundings obstruct incoming light. The appearance can change as you move the diamond or change the viewing conditions.
Some contrast is normal. The concern is a central band that stays conspicuously dark through ordinary movement and keeps drawing your eye away from the rest of the stone. One still photograph cannot show how that contrast behaves.
A bow tie is not automatically a crack, an inclusion or evidence that a diamond is fake. Natural and lab-grown ovals need the same visual assessment; neither origin guarantees a better-looking centre.
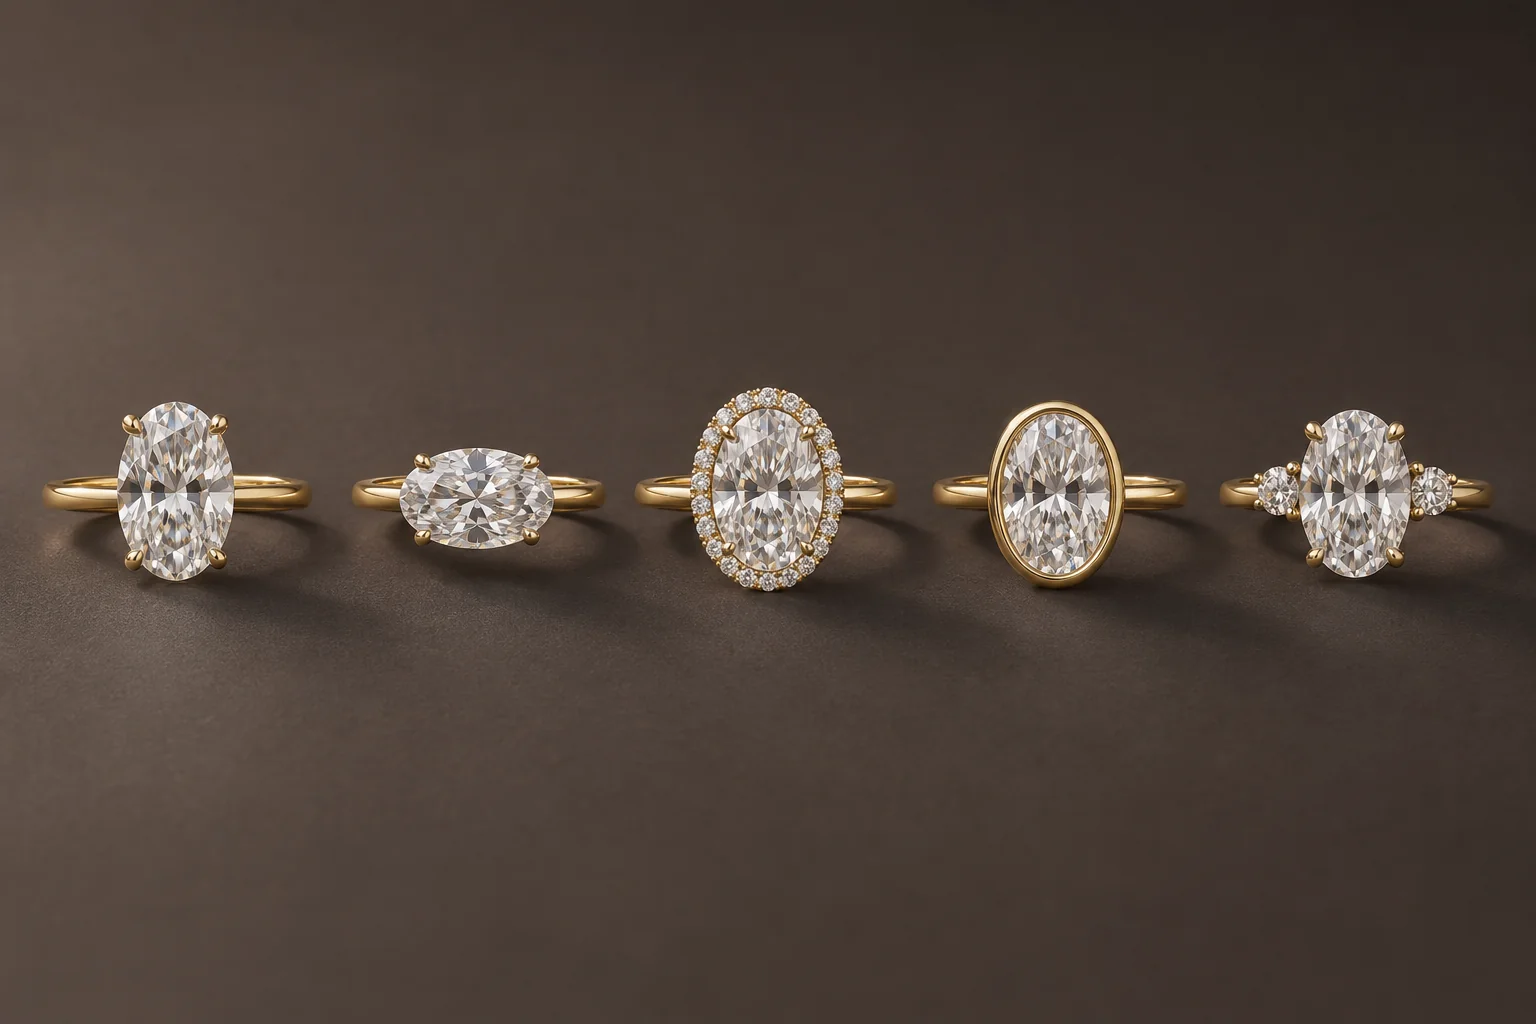
Five oval diamond settings at a glance
Compare centre-stone visibility, inspection access, design purpose, edge coverage and everyday comfort. These are design choices, not a measured ranking of bow-tie reduction.
| Setting | Best for | Key limitation |
|---|---|---|
| Open-gallery solitaire | An uncluttered view of the oval | Also leaves an unwanted bow tie plainly visible |
| East–west | A horizontal oval design | Rotates the bow tie rather than removing it |
| Halo | A framed centre stone | The centre still needs to perform on its own |
| Bezel | Metal coverage around the edge | Rim thickness changes the visible outline |
| Three-stone | A composition with side stones | Adds matching decisions, not a bow-tie solution |
1. Open-gallery solitaire: best for inspecting the oval
An open-gallery solitaire holds one centre diamond without a surrounding halo or side stones. It keeps the oval’s outline, central contrast and brightness easy to judge as the stone moves.
The open gallery is the space beneath the diamond. It does not guarantee that extra light entering underneath will remove a bow tie; the cut and viewing conditions still govern the appearance.
- Advantages: a clear view, a simple design and no side-stone matching decisions.
- Trade-offs: an obvious bow tie stays exposed, and the design does not provide the continuous edge coverage of a bezel.
Verdict: choose it for visibility and simplicity, not optical correction. If you are also considering detail on the band, compare pavé and solitaire engagement ring styles.
2. East–west setting: best for a horizontal oval design
An east–west setting positions the oval’s long axis across your finger rather than along it. Rotating the stone does not change its underlying facet arrangement: the dark feature rotates with it.
- Advantages: a distinct horizontal silhouette, without needing surrounding stones.
- Trade-offs: it does not remove a bow tie, and the width and comfort need checking on your finger.
Verdict: choose it because you prefer the orientation. Ask to see the actual oval in that position before approving the design.
3. Halo setting: best for a framed oval outline
A halo surrounds the oval with smaller stones. That border changes the ring’s composition, but it does not recut the centre or correct its central light behaviour.
- Advantages: a defined oval border and extra detail for buyers who prefer a decorated setting.
- Trade-offs: small settings need inspection and cleaning; their sparkle does not prove that the centre performs well.
Verdict: approve the oval independently, then decide whether you like the surround. A busy halo is not a reason to accept a dark band that already bothers you.
4. Bezel setting: best for metal coverage around the edge
A bezel surrounds the diamond’s perimeter with a metal rim. Its practical distinction is edge coverage, not guaranteed improvement to a bow tie. Discuss how much of the outline the rim will cover and how the gallery will be constructed.
- Advantages: a continuous metal border without exposed claw tips around the centre stone.
- Trade-offs: the rim covers part of the edge and does not guarantee a brighter centre. Fine and substantial rims create different visual results.
Verdict: choose a bezel for its construction and appearance, not a promised light-performance fix.
5. Three-stone setting: best for a side-stone composition
A three-stone setting places a stone on either side of the oval. It changes the visual balance across the finger and introduces choices about side-stone shape, proportion and appearance.
- Advantages: a broader composition and another way to personalise a bespoke design.
- Trade-offs: more matching decisions, with the centre diamond’s underlying bow tie unchanged.
Verdict: choose side stones as an intentional design feature. Wait if the centre remains unresolved: bright side stones do not make its dark band acceptable.
How to assess an oval before choosing its setting
- Inspect movement. Ask for a face-up view followed by gentle tilting. Does the central band change, or remain the dominant feature? Neither one flattering angle nor one unflattering frame tells the whole story.
- Change lighting. Compare diffuse daylight with ordinary indoor lighting. Use a comfortable viewing distance; putting your face or camera very close changes the obstruction.
- Check the report. Read the origin, measurements, carat weight, colour and clarity. Verify the report number with the issuing laboratory and ask how the diamond is matched to it. Weight alone does not tell you face-up size or bow-tie severity. Our certified loose diamond guide explains the wider selection checks.
- Approve the setting. Only after accepting the oval should you settle its orientation, edge coverage and surrounding stones. Ask for the construction details rather than relying on a reference photograph.
How we ranked these settings
The solitaire comes first because it keeps the centre easy to judge. The other designs answer different preferences — orientation, a halo border, metal coverage or side stones — rather than promising progressively better light performance. No universal bow-tie reduction figure applies to these setting categories.
Send David your ring brief
Choose the setting for the design benefit you want, while keeping the same standard for the centre stone. For personal guidance, send David:
- Your comfortable Rand budget for the complete ring.
- Whether you prefer natural, lab-grown or a comparison of both.
- Your preferred oval outline and setting style.
- Your timeline and whether you can attend a Johannesburg appointment.
- Whether you need delivery arranged.
- Any central darkness you have noticed in a shortlisted stone.
A reference image communicates a preference; it does not specify the appearance of your actual diamond. Read about bespoke engagement rings in South Africa and the 3D CAD render before you commit.
Share your budget, diamond preferences and timeline with David.
Discuss your oval ring with DavidFrequently asked questions
What is the best setting to avoid an oval diamond bow tie?
No setting reliably removes an oval diamond’s bow tie. An open-gallery solitaire is a useful starting point for inspection because surrounding stones do not distract from the centre.
Does a bezel setting get rid of the bow-tie effect?
A bezel setting does not guarantee removal of the bow-tie effect. Choose a bezel for its metal border and edge coverage, then assess the actual diamond and proposed construction.
Will an east–west oval hide the dark band?
An east–west setting rotates the oval and its bow tie rather than removing the feature. View the diamond in the intended orientation before approving the design.
Do lab-grown oval diamonds have bow ties too?
Yes, lab-grown oval diamonds can show bow ties, just as natural oval diamonds can. Assess the individual stone’s appearance rather than treating origin as a light-performance guarantee.
Can a diamond certificate tell me how bad the bow tie is?
A grading report alone does not establish whether an oval’s bow tie will bother you. Use its identity and grading details alongside direct observation or clear moving views.
Should I reject every oval diamond with a dark centre?
No, a dark area in one image is not enough to reject an oval diamond. Check whether the contrast changes during ordinary movement and whether it remains distracting across different lighting conditions.
How do I start an oval ring enquiry in South Africa?
Send David at Diagem your comfortable Rand budget, natural or lab-grown preference, setting ideas and timeline. Johannesburg viewings are by appointment, and nationwide delivery is offered across South Africa.
One last check before you commit
Ask: “Would I still choose this oval without the surrounding design?” If the answer is no because the central darkness bothers you, return to the diamond shortlist. More metal or more surrounding stones is not a substitute for a centre you enjoy looking at.